Showing posts with label Dessert. Show all posts

Tuesday, February 7, 2012

Strawberry Covered Chocolate Fudge Pie!


Where to begin?  First off this pie is so chocolatey!!  And the combination with the fresh strawberries reminds me of chocolate covered strawberries.  The base is an amazing recipe I found on Chocolate-Covered Katie's blog.  A few weeks ago I made it for my girlfriends and it was so rich and chocolaty I knew I would be making it again.  Today I made this slightly different version and DrOgg exclaimed, "This is the best thing I've ever tasted!"  And those of you who know him know he's not one to gush so that's quite a compliment.  Of course, you say, "Chocolaty goodness combined with fresh strawberries is a no-brainer so what's the big deal?"  First off, Chocolate-Covered Katie's recipes are all shockingly healthy and low in sugar...I remember shocking my gal pals by telling them one of the main ingredients in this pie is tofu!  Also, inspired by Katie's creativity I decided to attempt a healthy, low sugar glaze for the strawberries and couldn't be happier with the results.  I just think it goes to show that you don't need a lot of sugar to dress up fruit which is so naturally delicious as it is.

If you're going to try this recipe (and I really hope you do) the first step is to make the strawberry topping.  This recipe is enough to glaze about 8-10 cups of fruit and you will need about four to five cups of strawberries for each pie.  I removed the tops then cut the smaller strawberries into halves and the really big ones I quartered but, I'm sure there's more than one way to cut a strawberry!


Healthier Strawberry Fruit Glaze


1/2 cup water
1 cup Strawberries
1 1/2 tbsp corn starch
1-2 tbsp sugar or sweetener of your choice
1/2 tsp vanilla
2-3 drops of red food coloring (optional)


Combine first four ingredients in a food processor or blender until smooth and corn starch has disappeared completely.  Transfer to a small sauce pan and heat until boiling.  Lower temperature but, keep at a simmer and stir constantly until thickened (10-15 minutes).  It will still seem a little soupy but, will thicken significantly after it cools.  Remove from heat allow to cool 10-15 minutes before coating fruit.  While you are waiting cut your fruit up then mix with glaze until coated evenly.  Ideally chill for 20 minutes or more before serving.

Once you have your strawberries chilling in the fridge you can start on the fudge pie!  So, hop on over to Chocolate-Covered Katie's blog and follow the recipe for her Chocolate Fudge Pie.  Now, try to stay focused because if you're like me once you get on there you will be tempted to go and look at all the other amazing recipes.  Ok, go ahead....I can't help it either but, promise you'll come back and don't forget about me. Katie says you can use either firm or silken tofu for this recipe but, I have tried it both ways and the silken has a much more appealing texture.  She also suggests if you have one you can use a spring form pan for this recipe.  Unfortunately I don't so, I'm going to tell you how I did mine.  First, I made it as instructed and it was super quick and EASY!  I placed the filling in graham cracker crust which was yummy but, you could probably go with chocolate or even a plain crust just as easily.  The recipe is the perfect amount for one chocolate fudge pie or TWO strawberry chocolate fudge pies.  I actually found the fudge pie by itself a tad rich so, maybe that's why I like my version so much.

Instead of making one pie separate your filling into two crusts.  Cover each pie with half of the glazed strawberries.  Now if you like you may garnish with tiny chocolate chips like I did or chocolate sprinkles or shaved chocolate...whatever floats your boat.  It will taste just as good without but, I just liked the way it looked.  Now, this pie is best after chilling for several hours but, when it's ready I hope you enjoy every guilt-free bite!


Update:  This week I lucked out and found a set of springform pans on clearance for just $2.  This is something I've been wanting to invest in for awhile and I'm so glad I did.  Though I got lucky, I think these would totally be worth it for full price.  I just made the recipe again in the spring form pan and not only does it look way fancier but, I decided it is so much better with a homemade crust!

Monday, January 30, 2012

Oreo Stuffed Chocolate Chip Cookie Bars!!!

First, I have to say Happy Birthday to DrOgg today!  He is getting old but, that's okay because all of his patients still think he doesn't look nearly old enough to be their doctor.  ;-)   Of course he is on nights this month (7 pm to 7 am and he sleeps from about 9 am until 5 so he can grab dinner and see the Ogglet for a few minutes before dashing off to work. 


 Of course since it's his birthday he also has Ortho call also which means he will have to go in 2 hours earlier and won't be able to eat dinner with us at all!  Being the loving/doting wife that I am typically I will make him his favorite food for his birthday...lasagna.  But, since he wouldn't even be able to eat it I decided maybe I would make a favorite dessert.  Well, I hate to admit that I did not discover this recipe that seems to be his current favorite my friend Brooke did.  Of course it has to be a cookie recipe, right?  I told you how much I don't have time or patience for cookies in a previous post.  And considering that I am now 39+ weeks pregnant, birthday or no birthday, these were destined to become bars, period.  So first I have the original recipe here if anyone wants to try it and it is really good!  But, if you want to be lazy like me and make some awesome bars just slide on down to the second version.


Oreo Stuffed Chocolate Chip Cookies

2 sticks softened butter
3/4 Cup packed light brown sugar
1 Cup granulated sugar
2 large eggs
1 Tablespoon pure vanilla
3 1/2 Cups all purpose flour
1 teaspoon salt
1 teaspoon baking soda
10 oz bag chocolate chips

1 bag Oreo Cookies, I used the double stuff 
1.  Preheat oven to 350 degrees F.   In a stand or electric mixer cream butter and sugars until well combined.  Add in eggs and vanilla until well combined.
2.  In a separate bowl mix the flour, salt and baking soda.  Slowly add to wet ingredients along with chocolate chips until just combined.  Using a cookie scoop take one scoop of cookie dough and place on top of an Oreo Cookie.  Take another scoop of dough and place on bottom of Oreo Cookie.  Seal edges together by pressing and cupping in hand until Oreo Cookie is enclosed with dough.  Place onto a parchment or silpat lined baking sheet and bake cookies 9-13 minutes or until cookies are baked to your liking.  Let cool for 5 minutes before transferring to cooling rack.  Serve with a tall glass of milk, enjoy!
Makes about 2 dozen VERY LARGE Cookies


Quick Version:
The main modifications I made were to the tempurature and cook time. (Refer back to November: Tip of the Day: The Margie Edition to find out how you can make your own favorite cookie recipes into bars.)  I also made them slightly healthier with a tad less sugar and some whole wheat flour snuck in (no need to copy this aspect).  I have to admit that I never tried the first recipe even when Brooke was kind enough to give us a bag full of them because DrOgg ate them up too fast.  But, after trying my version he did a happy dance so I think it must live up to the original.  I thought they were great!  And I was pleasantly surprised at how soft the chocolate chip cookie part turned out in bar form so I 'm thinking this would be a good recipe for chocolate chip cookie bars even if you didn't have or -gasp- don't even like Oreos.


Oreo Stuffed Chocolate Chip Cookie Bars

2 sticks softened butter
3/4 Cup packed light brown sugar
3/4 Cup granulated sugar
2 large eggs
1 Tablespoon pure vanilla
3 Cups all purpose flour and 1/2 Cup Whole Wheat Flour (or just use 3 1/2 c of all purpose)
1 teaspoon salt
1 teaspoon baking soda
10 oz bag chocolate chips
12-15 Oreo Cookies, I used the double stuff

1.  Preheat oven to 325 degrees F.   In a stand or electric mixer cream butter and sugars until well combined.  Add in eggs and vanilla until well combined.  This step is important with bars to do thoroughly so they aren't too dense so whip them as much as you have the patience for.
2.  In a separate bowl mix the flour, salt and baking soda.  Slowly add to wet ingredientsuntil just combined. Fold in chocolate chips.
3.  Take 2/3 of the dough and spread into an un-greased 13x9 pan. Then take your Oreos and press them into the dough trying to make the tops of the Oreos as even with the top of the dough as possible without peeking through the bottom.  I found using the palm of my hand worked the best for this step and don't worry about breakage because they will break and it doesn't matter.  Also, I used 12 cookies as you can see here but, I'm thinking you could definitely fit at least f15 if you want more Oreo goodness.


Next, take the remaining 1/3 of the dough and spread evenly over the cookies/dough.  I did this by spreading my dough evenly over a piece of wax paper until it was the right size and shape to evenly cover then turned it over and removed gently onto the top.  But honestly you could probably just dollop a little over each cookie and it would turn out fine that way too.  Either way it will look something like this:


Now, bake for 25-30 minutes in a 325 degree oven and let cool for 10-15 minutes before cutting but, when you do it will look something like this:


Serve with a tall glass of milk...


And enjoy!


Wednesday, January 25, 2012

Winter Squash A-Z: Spaghetti Squash Gratin


So I have to admit once again that I had never eaten spaghetti squash until today.  And now I know what I was missing!  If you haven't had it before run (don't walk) to your local grocer and then try this recipe.  I can't get over how little you need to make this gratin and yet it is so yummy!  First, I think if you have a picky eater in the family this is the squash to try because it has a much more subtle flavor than any squash I have ever tried.  And I can't get over how cool the squash "transforms" to a spaghetti like consistency.  It amazed me because it was so difficult to cut in half before baking but, after scooping the flesh out it came apart into a consistency somewhere between linguine and sauerkraut.  I don't know that I could really describe the flavor but, it is subtle .....and really good.  Also, this gratin is amazingly simple to make with very few ingredients.  I'm thinking it is going to be my new favorite squash recipe....perfect as a side with your dinner at home or, to take to a potluck!  When you follow the link over to the recipe you will be on a blog that is a new favorite of mine as well.  So far I've only made two of her recipes but, I love how she combines comfort foods with healthy cooking.  Next I want to try some of her ethnic recipes.  But, just click on the link below to hop on over to Daily Unadventures in Cooking and just peruse the variety of interesting recipes.

http://www.dailyunadventuresincooking.com/recipe/spaghetti-squash-gratin-recipe/


If you like a sweet snack that is also easy to make try the Peanut Butter and Jelly Bars.   I think I am becoming a big fan of bars over cookies because I can whip it together and get it in the oven.  For me, baking batches of cookies and watching a two year old just don't mix.  So, I have made these twice over the last few weeks and they are nice for a snack any time of day.  Being pregnant I also like that they satisfy my sweet tooth and my appetite at the same time. They're also tastier if you sing Peanut Butter Jelly Time in your head while eating them. Try it!

http://www.dailyunadventuresincooking.com/2010/02/peanut-butter-and-jelly-bars-recipe.html/


Monday, January 9, 2012

Winter Squash A-Z: Ooey Gooey Caramel Pumpkin Blondies


I wish I was one of these blogs where the people make up their own recipes (maybe one day).  But, after making this yummy treat there was no part of me that was thinking about anything but, eating these squares of goodness.  They are a yummy "seasonal" change to traditional blondies.  And If you love pumpkin desserts like I do then, it never hurts to add something to your repertoire.  When I made these last night I really wish I had bought some vanilla ice cream when I bought the ingredients because the picture on the blog looked so good.  I have had warm blondies with ice cream before and they are to-die-for.  So that is one tip I would suggest if you have to buy some ingredients like I did...don't overlook the ice cream.  This morning they were really good too, and I think I heard approval from the playgroup that came over and got a taste.
Overall they were pretty easy to make.  I found the most difficult part was trying to spread the top layer of batter on top of melted caramel.  I'm not sure that I really had kept aside the full 1/3 so maybe more cautious than I was and you will find this easier.  Since I threw on only like two dollops (also not thinking) it was challenging to then spread it over the whole dessert.  What I ended up doing was kind of a zig zag thing with my silicon spatula at the end that gave it a kind of marbled/decorative effect and looked like less of a mistake.  In the end even, after I worried it it wasn't enough batter on top it turned out fine.  Maybe if I tweaked it at all I might add a bit more nuts....if you really love em like I do.  Also, don't succumb to the temptation to double the chocolate chips as I was tempted to do.  Though they don't seem like a lot it does seem that they are just the right amount when all is said and done.  If you try the recipe please let me know and also take some time to peruse the Tasty Kitchen Blog....looks like there is a lot more inspiration to be had on there.

http://tastykitchen.com/blog/2011/10/ooey-gooey-caramel-pumpkin-blondies/
http://www.twopeasandtheirpod.com/ooey-gooey-caramel-pumpkin-blondies/

If anyone out there is actually following this series...up next: spaghetti squash!

Tuesday, November 1, 2011

Tip of the Day - The Margie Edition


So, for you faithful readers it is no surprise that I have some new tips to share.  But, what you may not know is that I have an awesome friend named Margie.  She is super nice and was the first neighbor that really befriended me when we moved here.  She is a mom of 3 kids under 5 and a wealth of knowledge when it comes to parenting preschoolers.  The most amazing thing to me is she really seems to do it all with un-flustered ease.  Sad to say though, she is moving far far away to Kansas and so since I will miss her so much and you will likely never get to meet her I will be sharing just a few of my favorite Margie tips/ideas.

Tip #1 If you have preschool age kids implement this tip and your drives will immediately become more relaxing.  She didn't so much tell me this as I just noticed when riding in Margie's minivan that she has it set up 24/7 like she is going for a long drive.  Stock your car but, not just with water bottles and tissues (like I do) but, do like Margie and have special toys and activities that just hang out in the car.  She has her two oldest girls on either end of the bench seat in the back with a basket in between filled with markers and pads and books and toys.....whatever keeps the kids entertained.  So, don't hesitate...do this now!

Tip #2  If you are like me you really enjoy eating homemade cookies and if you are lucky maybe you have a few really great cookie recipes hanging around.  (I only have one really good one so feel free to share)  But, either due to the demands of everyday life I rarely seem to get around to making them.  So, Margie gave me the best tip ever that has allowed my family to enjoy home baked goodness on a much more frequent basis.  Just take your favorite recipe for cookies and instead make them into cookie bars.  All you have to do is reduce the temperature of your oven by 25 degrees, add about 10-15 minutes to the cooking time.  She also mentioned whipping the eggs and butter really well so that they stay soft and don't get too heavy.  So, go make your grandma's yummy cookies in less than 1/2 the time!

Tip # 3  Now, this is earth shattering if you have a toddler that just doesn't want to give up her binkie.  The Ogglette didn't really hang onto hers so I never got to try this technique but Margie did with all of hers and assures me it's foolproof.  You can forget being the bad guy or trying to manipulate your child with gifts/rewards in order to pry that thing from their tiny hands.  Instead, make it happen "naturally"  Just snip the very tip off of their binkie and when they suck it will no longer work right.  As a result the child just rejects the binkie on their own and everybody wins.

Last but, not least I want to share the best thing Margie ever baked for me.  They are pumpkin cupcakes with the best cream cheese icing I have ever had.  Try them:
http://www.tasteofhome.com/Recipes/Pumpkin-Spice-Cupcakes-with-Cream-Cheese-Frosting

Monday, October 10, 2011

Ogglette's Fall Themed Birthday Party

What an exciting day!  My Ogglette was turning two and I was so looking forward to family visiting and celebrating with everyone.  But, honestly, other than the vague idea of a fall theme I didn't plan much ahead.  Our lives have been super busy with other things like Rob's ever more demanding Residency schedule, looking for a minivan for me, and just preparing for Ogglette #2 who is due on February 4!
So, I can be a bit of a procrastinator at times but, even I know when it's a week until party time you had better get your butt in gear.  I sat down the weekend before and wrote out a rough menu and searched online for fall decorating ideas (though I really didn't use any...none were cheap or quick enough).
One thing I know for sure was that I wanted to make a pumpkin cupcake recipe that my friend Margie shared with me.  She made some for us in September and they were soooooo yummy that I just know they had to be a part of this fall birthday celebration.  The Ogglette was my big helper the night before the party.  She put the cute Halloween cupcake cups into the pans for me.  FYI...if you shop at Aldi like I do, keep an eye out for seasonal items like this.  I bought 75 cupcake cups for 99 cents.  Not only was this way less expensive than the supermarket, I actually thought the designs were a little cuter.  That's why I always shop there first.


She started out okay on the task then lost track on what she was supposed to do.  After getting all the paper cups where they were supposed to be she proceeded to take them all back out and stacked them in one big pile....then made another stack, etc.  This did keep her busy though the whole time I made the pumpkin batter so, I didn't mind.


I know this was specifically a cupcake recipe and had never experimented but, wanted to make Annabel a cake too.  So I took about half of the batter and divided it into two round layer pans.  The rest became 12 cupcakes instead of the 24 the recipe usually would make.   I was actually super happy with the results of the experiment.  The cake was moist and spongy but, it didn't rise a ton in the middle and since it baked so evenly I didn't even bother cutting the tops down before icing it.


Now, if you're a total cake decorating amateur like me I recommend ALWAYS practicing your decorating techniques before doing the actual cake.  I've found for me that the easiest is to just practice on the dirty cake pan (upside down) so you have the exact size and shape.  Although, I don't recommend what you see above which is being lazy with the practicing and leaving a word out.  Of course the thing I messed up on the actual cake was my daughter's name....kinda important.  However, as my hubby kindly pointed out when I messed up my very first cake....there is no reason you can't scrape the words off, re-ice and start again!  So, I've done this quite a few times as you can imagine.


I wanted a quick colorful way to decorate the cupcakes and my sister suggested sprinkles which I thought would be super cute.  Of course, I couldn't find fall colored sprinkles at any of the three grocery stores I shopped at the week before the party so, I improvised with candy and might be even happier with the results.  If you are inexperienced like me I recommend candy for decorating esp. kids cakes.  They lend some color and fun without any need for special skill or creativity.  For the pumpkins I cut them in halves before putting them in the icing.  Also, In hind sight if you are nervous about doing a border on the bottom of the cake or lack piping tools than you could probably border the bottom with candy corn.  Might look pretty cute...

If you want to a simple and fun way to save your family big bucks I would recommend learning at least the basics of cake decorating.  As you can see, my cake is not perfect but, it was delicious and everyone loved it. I can still remember appreciating that my mom ALWAYS made us homemade cakes for our birthdays. It made me feel special and even though she usually just decorated it with some sprinkles I always thought it was better than a store bought cake.  And I'm sure to my mom with four kids the less than $5 price tag of cake ingredients was a no-brainer over similar sized store-bought cakes that cost triple the price.  Mine cost less than ten if you would have to buy all the ingredients.  But, I had only had to buy the pumpkin pie filling and candy which was more like $4.  


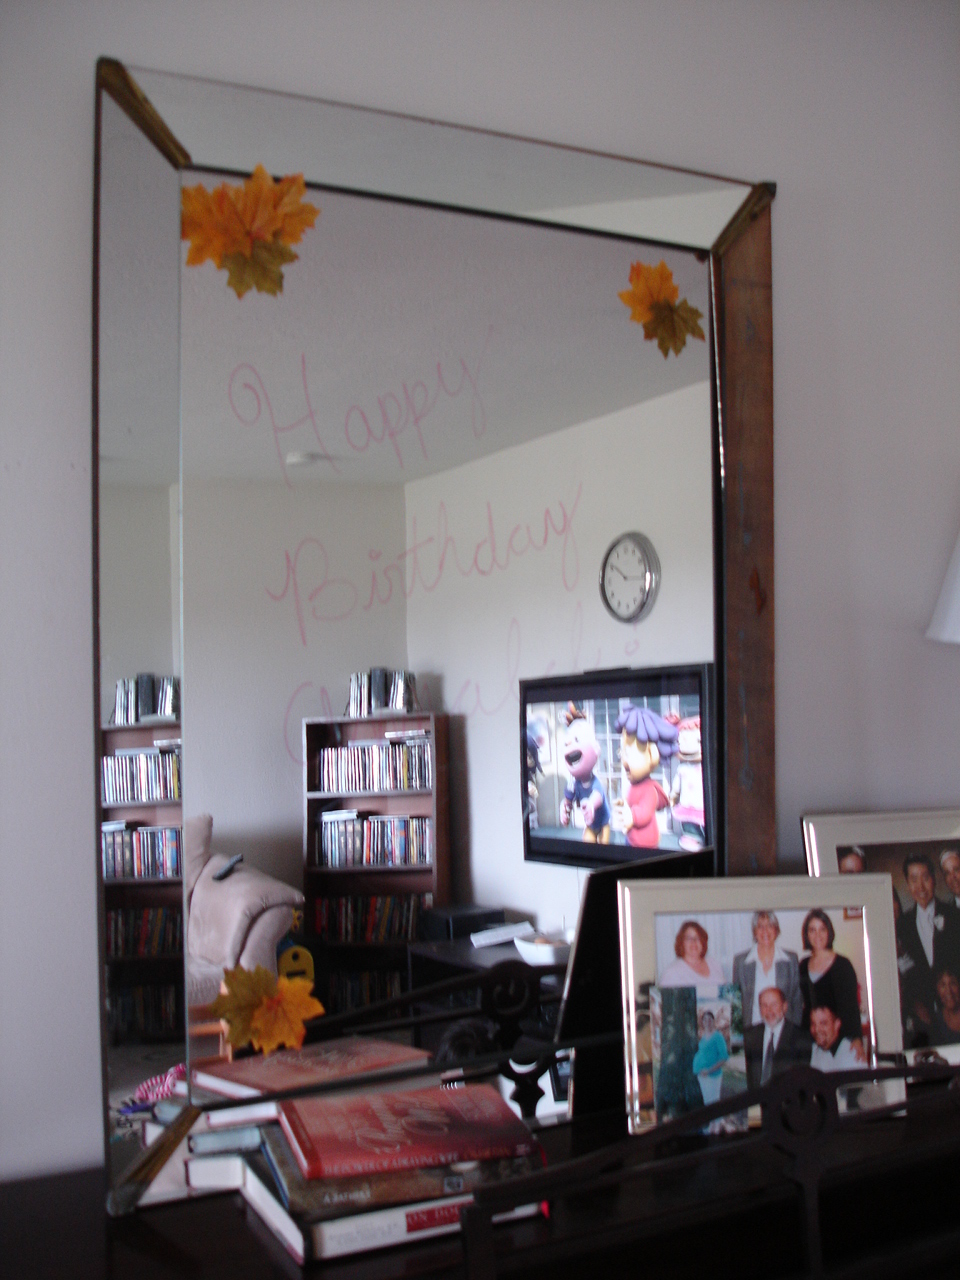
Here is my spread mid-party...seemed like it looked cooler in person.  Oh, well.  It was a week thrown together with minimal cost.  I decorated with colorful plates, cups and napkins from Target that cost about $6 altogether (and I've got lots left over for another day).  The candy was about $5....also have a lot for another day....oops.  And, I spent $5 at the dollar tree on some cute fall leaves, some tiny fake squash, and plastic spoons and forks.  In retrospect we didn't need the spoons.  Also, got  two cute little tins that were in some fall colors for a $1 each in Target's dollar section and they were the perfect size to hold the plastic ware.  Will definitely be reusing those.  My splurge was the table cloth for $3 at the thrift store.  I put the little leaves on the food table and taped them on the corners of the painting above the food table.  I decorated my mirror in the living room the same way AND used a dry erase marker to write Happy Birthday it.  I guess that is about $25 on decorations, plates etc. and I just put them here and there as it looked cute.  Nothing earth shattering but, if you're on a budget and in a hurry it's very doable.  Of course I am not counting food cost but, along with the snacks you see we also served my favorite easy bbq pulled pork, salad and cold drinks. 


I was super happy to use the drink server I bought at the thrift store a few weeks ago to have lemon ice water on hand for everybody. I figure I payed $3 one time for the server but, will save myself tons on bottled water in the future.  Of course no party is complete without my big sister's iced tea and no fall party is complete without cider.  If you look carefully, you can kind of see that I put some of the tiny squash with some leaves under the drink thing...also, seemed ot look cuter in person.  Ah, well, I tried.


Here you can see some of the leaves above the food table, and some of the tiny dollar tree squash attempting to liven up a real butternut squash we will be eating later this week.


Unfortunately this "sign" did not show up very well in pictures.  It was one of my favorite details because it was personalized and cost $0.  Also, it took like 15 seconds to do!


Another attempt to capture the Happy Birthday "sign"...can you just barely see it?

It doesn't look like it here but, the Ogglette LOVED her homemade cake.  haha


Okay, so maybe she liked the cupcakes better.


BBQ Pulled Pork:

Pupkin Cupcakes:

http://www.tasteofhome.com/Recipes/Pumpkin-Spice-Cupcakes-with-Cream-Cheese-Frosting